Sign up to our newsletter
Click to register!


Today, screen printing is the heart and soul of many bulk printing operations. It first rose to popularity in the 18th century, when it became easy to import silk mesh - a key component of screen printing - from the East. In the 19th century, screen printing became prevalent in the advertising world, and from then on, it has been used widely across many industries, including retail and electronics due to the easy customisation possibilities it affords.

While screen printing can be manual - especially used when there are only small print runs required - it is very often automated, using advanced inks and materials in combination with computer technology to mass print. One of the biggest advantages of screen printing is that it can print on almost any kind of surface, be it fabric, paper, glass, wood, card, plastic or leather. In this article, we will discuss the screen printing process, its uses, types, and benefits.
Screen printing, also known as silk screening or silkscreen printing, is the process of transferring a stencilled design onto a surface using a mesh screen, ink, and a squeegee (a rubber blade). The basic process of screen printing involves creating a stencil on a mesh screen and then pushing the ink to create and imprint the design on the below surface. The most common surface used in screen printing is paper and fabric, but metal, wood, and plastic can also be used. It is a very popular technique because of many reasons, but the most compelling reason is the vast choice of colours that can be used.
Screen printing can be done by hand or using a machine but the basic process is always the same. The differences can be of the type of ink used, its rendered effect and the printed surface. Below is the screen printing process step by step:
The first step in the process of screen printing is to create the design. Once a design has been decided upon, it is printed onto a transparent acetate film, which will then be used to create the screen or stencil.

When the design is all set to go, it is time to select the screen and mesh count. Mesh count is the total number of fibres in one square inch. Which mesh count you need will depend on the design being printed:
After the mesh screen is selected, it is coated with a light-reactive emulsion layer.
Generally, there are three main types of emulsion:
The transparent acetate film is placed on the emulsion-coated mesh screen carefully under a bright light which causes the emulsion to harden and develop. It must be noted that when multiple colours are involved in the design, separate screens must be used for different colours.
Exposing the screen for a specific time will harden the uncovered areas of the screen, and the remaining unhardened emulsion, if any, will be rinsed away to leave a clear imprint on the screen. The screen is then dried, and if there are any touch-ups required, it will be done by the printer to make the imprint as close to the original design as possible. Now, the stencil is ready to be used.
The material to be printed is placed flat on the printing board, and the screen on top of the material in the desired position, ready to be printed.

In this step, the printed design will come to life. The screen is lowered down to the printing board. The desired colour ink is added to the top of the screen. A squeegee will evenly distribute the ink along the length of the screen. The ink presses through the open areas of the stencil and transfers on the underlying silk, consequently printing the design on the product.

The stencil will have served its purpose once all the items are printed. A special washing fluid is used to remove the emulsion to reuse the mesh for creating new stencils.
Lastly, the printed product is heat-cured by passing through a dryer, creating a smooth design. This is done so that the design does not fade away.
There are six different types of screen printing processes. Since different techniques will provide different results, it is important to understand the different types.
The most common screen printing technique is spot colour screen printing. Spot colour screen printing uses the ink's stock colour by printing it through the stencil of the mesh. This technique produces a vibrant solid spot of colour. It is much simpler to use as compared to other screen printing methods. It can be an excellent option for printing on t-shirts, jackets, and hoodies, for example.
In halftone printing, single colours in gradients are printed. The entire process uses a single colour of ink, and this colour gets half-toned, resulting in a different shade when looked at from a distance. This technique is best used to obtain the multi-colour printing look without actually doing it. In addition, it is a cost-effective method since only one colour of ink is used.
Grayscale printing is an excellent method of printing full-colour images as one colour grayscales or halftones. The print will look more detailed if the halftone has more dots. It is not a black and white technique; instead, it pulls out the CMY or RGB or colour scales only but in shades of grey. Grayscale printing is one of the most cost-effective screen printing techniques, often used for printing black and white designs onto fabrics.
Duotone printing uses the combination of two halftones for printing the same image with two colours. First, a black halftone is printed with black ink, and then a second halftone is printed with colour ink. This technique is similar to sepia-toned print in photography. It provides a sophisticated and artsy effect.
It is the most complex screen printing technique. It involves the four basic colours – cyan, magenta, yellow and black. These four colours are combined to produce the required colour tones. It can be done manually but preferably should be done automatically for best results.
The simulated printing process combines the four-colour printing process with spot colour printing. Since this technique is useful for both lighter and darker shades, it is versatile and popular with people looking to produce photorealistic print detail.

When considering using screen printing technology, it’s worthwhile thinking about its benefits, of which there are many. Some of these benefits include:
One of the main advantages of screen printing is its versatility. It can be used on any type of fabric, plastic, wood, glass or even metal. Plus, multiple colours can be used. There is almost endless design freedom when using screen printing.
Compared to other printing methods, screen printing can apply a heavy ink coverage, resulting in a durable design. Additionally, certain coatings and additives can make the ink resistant to UV rays, scratches, moisture and chemicals, allowing screen-printed products to be used outdoors and in harsh environments without fading.
The vibrant and bolder colours produced by screen printing is quite tricky to replicate with other techniques. For multiple colour designs, separate layers are used, which allows each colour to preserve its actual brilliancy.
Screen printing is a cost-effective method in the longer run. Once the set-up is done, it is relatively quick and easy to print items at high volumes. So, it's safe to say the more you print, the cheaper the unit cost becomes.
Screen printing is one of the most efficient and fast printing techniques once a screen has been created. It is an excellent option if the same design is to be printed over and over again.
The screen printing process is fairly straightforward, whether it is automated or done manually. Moreover, the required tools are also not hard or costly to replace.
Screen printing is more versatile than other printing techniques as it can add a design to materials of any shape, size and thickness. As a result, screen printing has found use in many different ways, including:
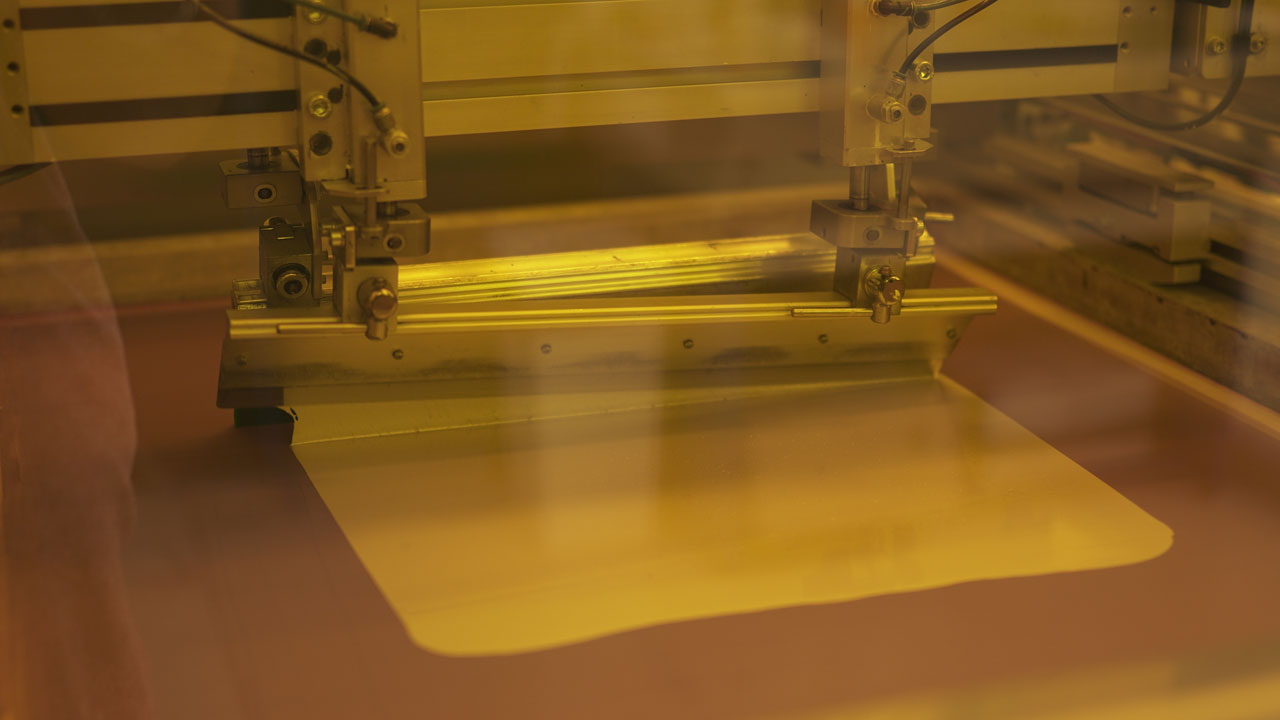
At Ynvisible, we design and manufacture ultra-low-cost smart displays at volume using roll-to-roll screen printing processes. Not only that, our displays have endless design freedom, so you can create exactly what you need from the outset. Explore our volume production capabilities here.
Press releases, success stories, and educational content from Ynvisible University.
Learn more 

.png)